Sunday, January 30, 2011

The 7 year old/new green blouse

Yes, that's right, 7 long years. This blouse was my very first attempted ever, to sew a garment. That was over 7 years ago. Okay, I am going to admit that I didn't know anything about patterns, fabrics, or sewing. I had only sewn curtains before and with a straight stitch, could garments be that hard? So years ago, I wondered about the fabric store and found this non stretch brocade fabric for a pattern that requires knits/stretch fabrics. I brought it home, guessing my size and cut, yes, cut the whole pattern out without doing any adjustments or fitting. After all, it looked like it would fit. LOL  Yes, I now can see how far I have come from that place. It feels good to have a little more understanding and growth. I wish I knew more but for now we are learning everyday and that's a good thing!  I am sure, you too have grown in your sewing or whatever you are passionate about. Sometimes, we forget to look at where we've been and how we have grown. This blouse was a great reminder for me. We all have to start somewhere! Okay, back to the story, anyway, after cutting the fabric, the project stalled because I didn't understand the directions and the piping was the last straw. Sadly, the pieces of this blouse sat in a box for seven years, but now, I am happy to say that I was able to pull it out of hiding. After sewing it to life, I found it a little bit tight, due to me not fitting/ making adjustments to it those many years ago, but I finished it. And  plan on wearing it out, maybe even on a date with hubby. And yes, my dears, I sewed the piping! I feel like singing and eating Chinese. If you are waiting to sew, what are you waiting for? There's so much to learn, tons of fun and maybe a few tears a long the way, but worth it.

Where are my chop sticks? They could look festive in my hair.
I like this green color, maybe a red for the next one.
I am not sure I would label this one as easy, but it's not advanced either, I will be making another blouse but adjusting as needed, Hubby loved this one.

Until next time, have a happy vintage day,

Gina

Friday, January 28, 2011

Apply piping

Oh, there are some technique of sewing that cause me some grief. Piping is one of them, at least it was. Years ago, before the Internet. Back when I was young, impatience and lacking any knowledge on the subject, not that I am an expert now by any means. I tried to make a book cover for my Bible with piping around the edges. It was a disaster! The piping went everywhere and was sewed uneven. Since then, I have noticed that I will avoid this sewing technique, instead of facing it straight on, well, no more avoiding. If I am going to sew, I must know HOW to sew, go figure. So, I looked at the piping in the plastic and decided it was smaller than I and it wasn't going to get the best of me. LOL. Once and for all, I would get it to obey and get in line. So after READING the instructions, I decided again, I am really a visual learner, I needed real pictures and video. You-tube is full of sewing videos, I highly suggest if you are struggling with any sewing techniques, just look for them there.

 Looking back, I didn't have a chance of sewing piping well, without the much needed tools and tips your ship is going to sink. Mine did, but I am happy to say I corrected my bad sewing ways. Here are a few tips I came across during my search for applying piping. First, I learned a piping foot or zipper foot is one of the best tools for applying piping, that goes without saying, but it's so true. The piping must go into the groove of the foot to sew close enough to the seam allowance, if not, then your piping and the piping's seam allowance will be showing.  Although, a piping foot won't work on all piping, sometimes the piping is too large to fit under the piping foot, this is when a zipper foot can be used instead to assist you. Another important thing about piping is to baste or sew it first to the right side of the fabric before sandwiching it between the another layer of fabric. If you don't baste or sew, it moves around on you and there's no guarantee that it will magically go where you want. After basting the piping, add the other layer of fabric on top and guide the  piping under the foot carefully. You can feel that it is sewing in the groove, just like a zipper. This is what the finished piping looks like after I sewed it. Whew, it worked. Learn more about how to apply and create your own piping here. This is only one way to apply piping, it worked for me but I am sure if you poke around the Internet you will find all kinds of great ideas. I'll be back soon with a finished shirt that has piping on it. Hooray, we are learning! Thanks for sharing these moments of discovery with me and thanks for your kind comments they are helpful to encourage this vintage girl. Oh, if you have any thoughts on piping, please pipe up. Sorry a bit corny, couldn't resist!

Still at the ironing board with this one, but piping is coming out pretty even.
This is the unfinished collar, soon to be part of a shirt.
Gina

Tuesday, January 25, 2011

vintage sewing finds!

Over the years, my sewing room has become pretty full with sewing notions and such. So, I try to buy just what I need and maybe a few deals from time to time. Well, I just bumped into these vintage patterns at the antique mall. I was browsing around, when I came to a booth just as the owner was bring in this box of patterns. He said he won them at an auction and would sell them all for 25.00 dollars.  As I looked through the box, I was delighted to find several great patterns and in a size 34 bust which is my size. I couldn't resist the price at about 25 cents a piece. I won't be keeping all of them. Later in the year, I am planning a give away and maybe some will hit eBay at a very low price, just passing on the love you know. I do find a lot of great tools for sewing at the antique malls, sometimes at great prices. Although, I have learned to steer away for buying old thread. I don't know if you have had any problems but I have. I bought some a while back and found it had deteriorated some. The fibers were not strong enough for my machine and the thread kept breaking every few stitches. I talked with some other sewers about this and they concurred, that old thread can be on the risky side for reliability. So for now, I won't buy old thread. Belt fasteners are getting harder to find where I live. Sometimes you find a whole lot, other times one and at a very high price. I have started to collect them too, as they pop up. Buttons are easy to find at the antique malls. I love them, especially all the colors they come in. Here are a few I have collected as well as some collars and cuffs that I hope will soon be part of a new outfit. The collars are more rare, in my experience to find, but sure are pretty. I hope you enjoy these pictures, unfortunately, these kinds of sewing notions are fading from our modern day society, although we will still have buttons, to me, they just don't have the texture, weight and color of the past. Vintage patterns are hard to find at the stores around here but in abundance on eBay. I feel patterns are easily discarded because they are "just paper", a friend of mine, cleaned out her family's house and threw a bunch away, not knowing the value of them. So, get them as you can and enjoy.
 Have a happy vintage day,
Gina

I hope to use these through out this year!

I love the peach colored ones the best.

Friday, January 21, 2011

The Square neckline dress


 I won this lovely pattern from ebay last week and was anxious to get my hands moving on this one. I like the idea of having an everyday dress, one that I can wear in the summertime around my back yard or about the town. This dress is one of those things that just fits and feels good on. I made it loose but still nipped it in at the waist for a bit of shape. This is just a sloper dress, for me that means that it's my sloppy copy, made from dollar fabric but as my son said "Mama, you can wear this one in public." LOL.  Even though it was not my intent to wear my sloppy copy, I think I will wear it in public, at least in the back yard to feed the chickens or fish in the pond. My plan is to tweak this one and make the final dress in linen. I am thinking of maybe a red or blue color. Any color suggestions? I would like a tieback for the dress too.  When I got this pattern, there were some details that I did not expect, mostly inside pleats on the front and back bodice, I would have liked darts better than the pleats at the waistline. I don't know if it going to be hard to change them to darts but I am going to try. You may not be able to tell but this dress has a 6 gored skirt that is screaming for a little top-stitching detail. Maybe I'll go all out with the next one and include the embroidery around the neckline. Other details about this dress that I like are the butterfly sleeves. I am glad to take a break from set in sleeves, as I find them challenging. These butterfly sleeves are easy to move in. I also shortened the hem and brought in up to the knee, it's a better look for a gal with my chunky legs. In the end, I am hoping the linen gives me a little more drape than the light, stiff cotton I used for this dress.  I am dreaming of warm weather, it's snowy right now, but at my house we are sewing summer dresses and somehow that makes it feel a bit warmer.

Have a happy vintage day!
Gina

The shoes are the same color as the dress, had them for years.

What is it with me and pink!  


I used seam binding on the neck facing, trying to make it pretty on the inside.

Wednesday, January 19, 2011

green dress dud!

Have you ever made something you just didn't like? Please share! I could use the support after this dress!  I do indeed have a dud for your laughing pleasure. I really am reluctant to post this one but when I started this blog, I promised I would share with you my sewing projects, despite if they were great, good or just bad. I could share with you only the great stuff, but learning comes from mistakes. And if you get anything from this post that is helpful, I will be happy in the knowledge that this dress helped someone out there to sew a little better.  So humbly,  I'll let you in on this one. It all started when I had made this dress before in cotton and loved the result. So, I thought, I'll whip one up in this nice satin green material. Wrong!

Here's some issues I had with putting this garment together.

1. Considering DRAPE and FABRIC!  Drape effects the way a garment lays. Well, as you know, satin has more drape than the cotton I used before. Although this pattern can be made in satin, according to the suggested fabrics on the back of the pattern, it didn't do well in my opinion. You can see where it droops and bulges out under the breasts. This is my first experience with satin, I am sure it's a wonderful fabric. It's funny how different fabrics can lay well and be forgiving of  pattern designs, while other fabrics tell the whole story. It just goes to show, that fabric matters and can change a garment drastically. I noticed, even with the loose fit around my hips, the fabric still showed some bulges and bumps that I want to keep secret. I am sure a girdle would help but I don't always want to wear a girdle, especially in summer! 

2. Pattern design.  Although I didn't go into this blindly, I knew the pattern called for these sweet little gathers around the waistline, which is not my favorite thing because it can look bulky. And it did just that, added too much bulk. In general, the fabric didn't play nice with the gathers.  All the extra fabric around my middle made for a messy looking bodice. Although gathers can look nice and the dress was designed this way, it wasn't working for me this time around. In the future, I will be considering body shape more closely and try to match up a more suitable garment style.

3. Dart issues. The other problem I was having with the bodice were the darts from the pattern itself, they were too high. After doing some research, commercial vintage patterns in general, make a pattern for a body of a 20 year old. This was the standard back in the day. If you are struggling with dart placement and are no longer in your 20's this may be your issue. I am not in my 20's anymore, so gravity and nursing has effected my bust line. I did take a stab at adjusting the darts but made them too low which causes dimples. Later, I was able to get them in the right position as you can see the bodice looks a bit better in the second picture.

4. Color. Making the whole dress in the green satin was just too much. My kids said "Mama, you look like a leprechaun." Kids are so honest, I knew they were right.
Here it is in all it's glory, I had a really good laugh because my husband said he liked it! lol

In the end,  I changed the darts. Tuck in as much of the messy waistline that I could and replaced the skirt with a black one I made. I even added trim to the sleeves. After all this I don't like the end result! This dress in going into a storage closet not hemmed, not to wear but as a reminder of all the hard work I did and all I learned in the process.  I hope this post will encourage you to know that sewing can be a challenge and it doesn't always produce a beautiful garment but that's okay because we are learning and getting a sew degree and that will produce something very good!

Until next time I hope to bring you a winner but for now, a good laugh is all I can offer.
Have a happy vintage day,

Gina

Friday, January 14, 2011

vintage dresses

I wish the texture of this dress would show up more, the photo is nice but the dress is even better in person!
Come springtime, I am getting some new shoes!

Don't you just love it when you find a vintage dress at the thrift? Well, I had an incredible day when I found this pink dress. It did have some soiling under the arms, but I searched the web for how to "wash" a vintage garment, I found out that these spots may not be from feminine glistening or a deodorant left on the garment, rather they may be the result of gases that are being released over time. Click here to learn more. All that to say, the spots were suppose to come out with a little baking soda and water paste. Some sites said mix baking soda with white vinegar. Well, I tried that and a lot of the stains did come out but not enough to be able to wear the garment. So, I did the unthinkable and hand washed the dress. Be careful if you are thinking of doing this to a vintage piece. With vintage pieces there are usually only one or two tags with the size of the garment and a company name. This dress was no exception, it had only the size listed, there were no washing instructions and no identification of fabric type. So, I was taking a chance, but the garment felt sturdy and sometimes you just need to do what you think might work, so I hand washed it. I am thrilled that I did. The stains came out along with a bunch of brown colored dirt and what remained was this clean, soft beautiful dress! It is in very wearable condition. Later in the spring, my sister is getting married by the pond on our property, I am thinking this might be a good dress to wear for her wedding day. 

I am going to finish this dress and post on it, it looks really cute on.

I also found this blue polka dot dress at the thrift that I am going to refashion. It fits so well, but I want to make a hemline adjustment to it and make more of an Aline rather than a full skirt. I have chunky legs so the hemline needs to fall in the right place or it's not too flattering. I believe this dress is not as old as the pink one. I would say maybe the 80's, my mom said the pink one looks like something she owned back in the 50's. Well, I am glad to find that there is still some vintage treasures to be found out there. Caring for them and "washing" them can be a hit or miss, but with a little care and some study on how to clean a garment,  it can work out.


Gina

Tuesday, January 11, 2011

Casey's sew along

Well, I wanted to give a quick post about the new sew along.  I am going to do it, who else is going to give it a try? Casey from Elegant Musing is hosting a sew along. The girl can sew and if you can't very well and want to sharpen your skills, here is your chance to sew with an instructor right at your side, well sort of. Check it out here. This dress can be downloaded from sensibility patterns or bought and sent by mail. I've had this pattern for awhile, but wanted to wait until my sewing skills were better, now the time has arrived to start it. I am looking forward to Casey showing us the steps of putting this pattern together, this will take the pressure off of figuring out the various seams and instructions. I also love getting ideas and learning from others the different ways of sewing. I hope you will think about trying it. Good luck to all of you who will be sewing this really pretty dress! I will be posting on this sew along from time to time, as well as some other projects I am cooking up over the next couple of weeks.

Have a fabulous vintage day!


Gina

Here's what the pattern looks like.
Thinking of this material, but it's a cotton.

http://blog.caseybrowndesigns.com/2011/01/swing-dress-sew-along/

Monday, January 10, 2011

Tools for the "beginner" sewer

Even though I have been sewing for years, mostly home decorating, and now jumping my way into the deep end of the garment pool. I am finding that the tools for sewing really make all the difference between being a happy sewer or a struggling, unhappy sewer. I pick A. These are only a few of the wonderful tools out there and for me, have made sewing so much easier.

1. A book called 
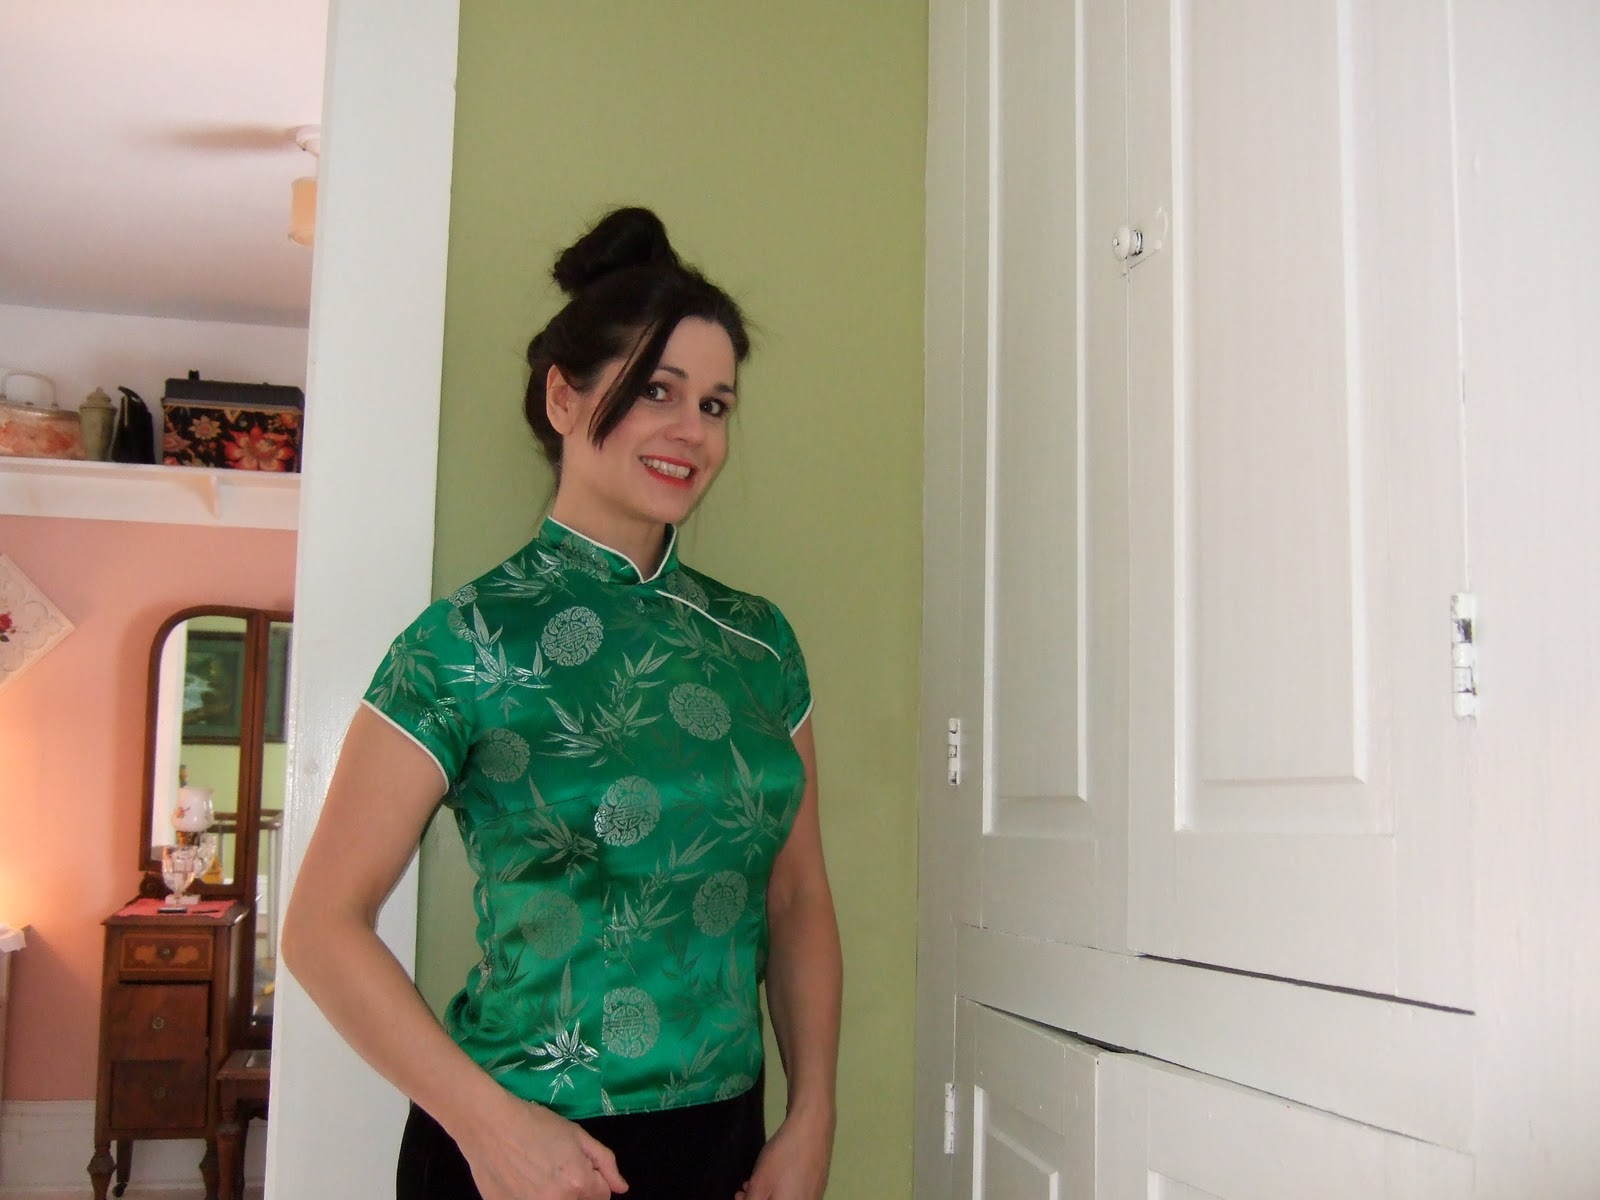
Fit for Real People by Pati Palmer and Marta Alto. This book shows you how to get a better fit. One day, I read it cover to cover while hanging out with my kiddos at Chuck E.Cheese of all places. Since then, I can make adjustments to any pattern based on the pictures of this book, so helpful to the visual learner!


Not the best picture because of the reflection of the paper but you can see the fit as you go process, it works pretty well.
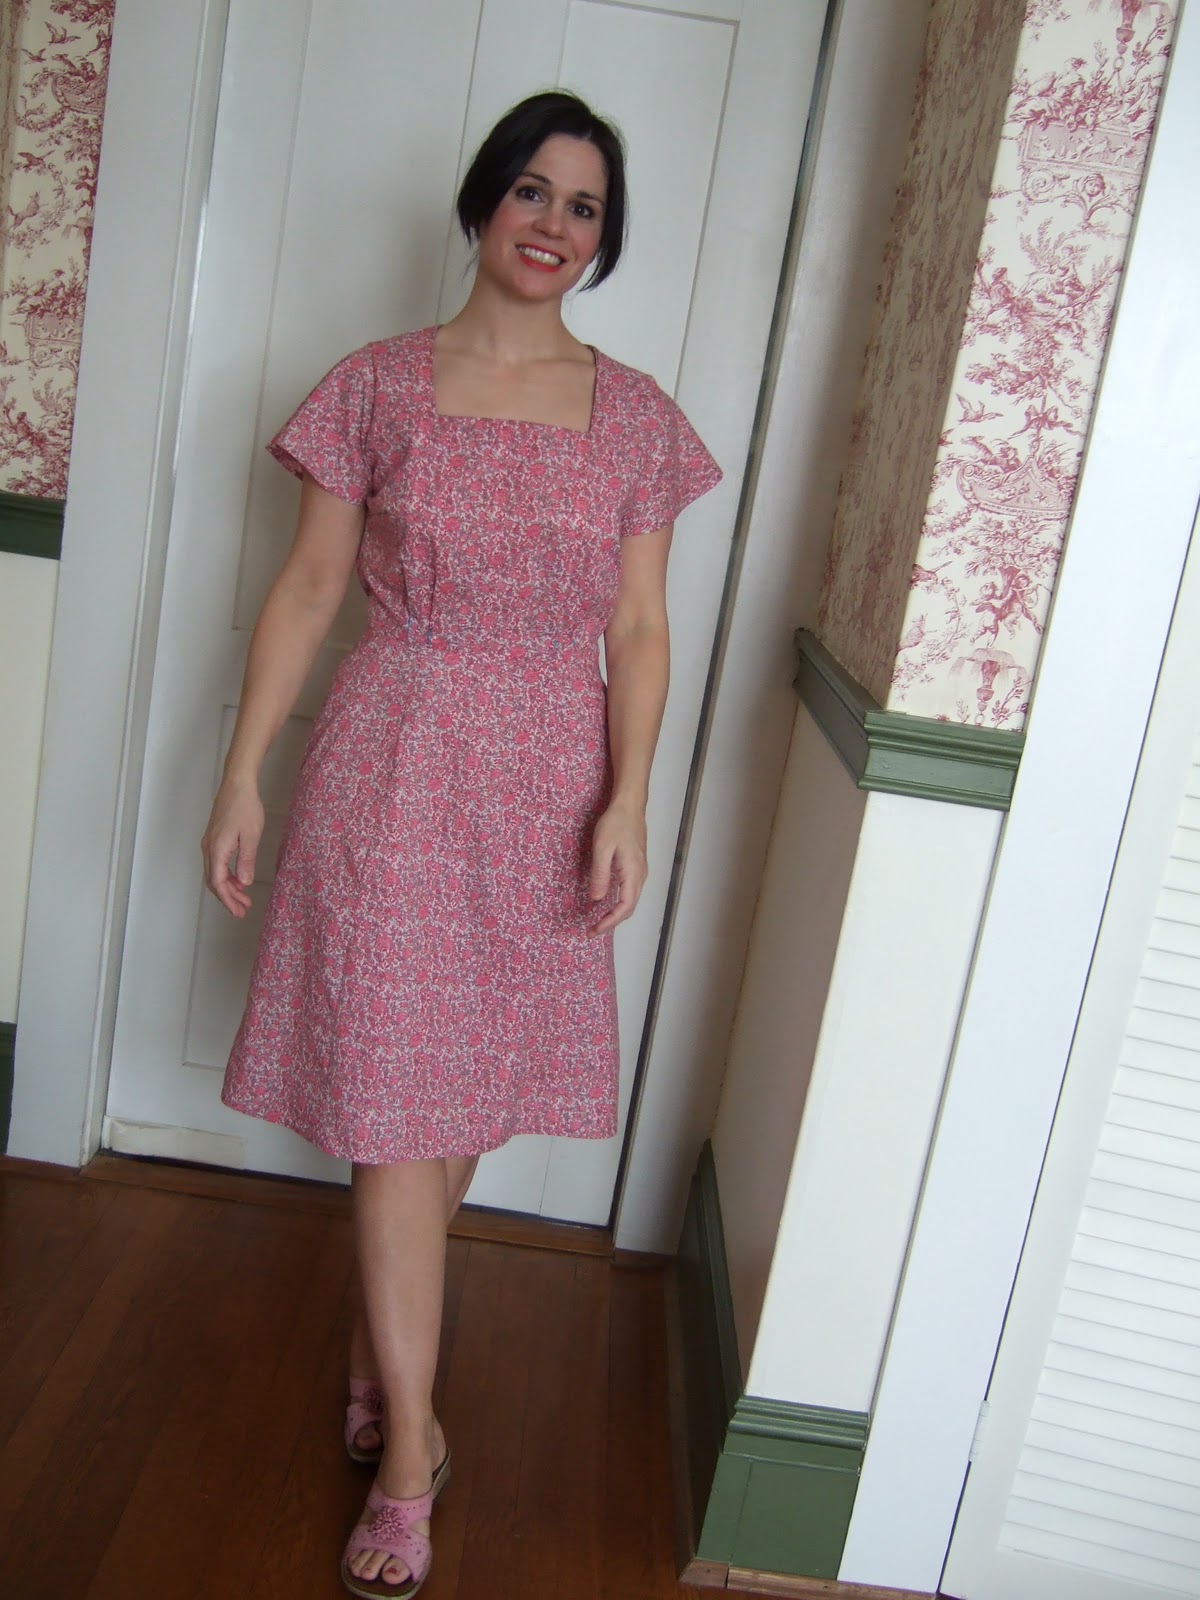
2. The Pin it hem marker! Oh, I can't tell out how much this has helped. I hate asking hubby after a hard day at work to pin up a hem for me. With the pin it, I put my dress on the my dress form and mark it all the way around and then hem it up. It comes out even! Hooray! This is a vintage item, I found mine on eBay for under ten dollars.


3. My homemade dress form. Yes, we made it. One day last year, Hubby taped me up with about 5 rolls of duct tape.The idea is that you will get a form that is your exact body, which is scary for me but great for dressmaking. Check it out here. Here is a you-tube video too. I think because of this form my hems come out even, since the form is shaped like my front and back, everything hangs like it would on me. If you are going to try this, stuff your form really well, mine has deflated a bit over the last year but I am going to open her up and get her adjusted. Other than that she has been great to use!
This was a fun day at our house, my kids were jumping around saying" Papa I want one too, please tape me up."


Here's the result, not bad! You have to stuff her from time to time but she was inexpensive and accurate for dress making. I like having a bra on her, so I know how low my neckline is getting!.

4. Seam ripper, need I say more, we have a love/hate relationship for sure!

5. Scissors, and thread scissors. These little thread scissors are my constant companion while sewing. My hand got so use to using them that I don't cut threads off without them very well. Love these!


6. Marking pins, I have tried to sew without marking, it doesn't work very well.

7. Invisible zipper foot. I am glad I brought one, I am trying to put in only invisible zippers not very vintage of me, but gee they look so much better.

8. I also found that I needed hanging space in my sewing area.  I had pins and fabric bunched up on my counter, now I hang all my projects and can get to them quickly. I found this shelf/hanger in one of our closets, unused, so we popped it up and it works great to keep me organized.


 These are my top few tools, I am keeping in mind not to collect too much stuff, I find when I have too much, my things get in the way and I don't enjoy the hunting, cleaning, sifting through "stuff" to get to that item that will help.  
Have a wonderful Vintage day!
Gina

Thursday, January 6, 2011

Complete a project please!

I keep hearing a pesky little voice inside my head saying "finish your undone sewing projects". Really, it's just that nagging feeling that spring will come and all my dresses will be in my sewing room with one little thing not done to them and there they will stay unworn! This one needs a blind hem put in, that one needs the sleeves adjusted, and the one forgotten  in the corner shelf still needs the skirt attached with the ribbon I neglected to buy! Well, I must obey and finish them soon or there will never be any peace! Really, the problem is I  get excited about a future project while working on another one. Especially if the current project is going well and then I hit a major wall that requires too much brain watts, it's then that I will start a new project and leave the other one for later, much later. Well, with the new year, I am cleaning up my act and finishing what I started! Now maybe I'll get some sleep! No more nagging  LOL. Although I do admit I like having a couple of projects going at a time , just need to make sure to finish them.  So for the last couple of days I have worked on both these two dresses and now they are going into my closet it wear! Hooray! Here are the finished dresses,  the pictures were taken by my 9 year old, that says it all. He has trouble holding the camera still bless his sweet little heart.


This fabric is what I call "learning to sew fabric", therefore it's cheap!

I made the hem shorter and got rid of the pleats in the waist front.

I won't be wearing my hair like this, when wearing this dress.


This two piece feels great on, it's cotton but since losing weight it's a bit big.

Monday, January 3, 2011

Pinky Dress


I feel like a farm girl from the 40's, where's my apron?
The pink purse is vintage and a favorite of mine.

I love our chickens, couldn't resist taking a picture with them.
It's a bit windy today!

Oh, I am so glad to get this dress finished, it was fun to make but the anticipation of seeing it done was overcoming me! I worked on it for about 2 weeks. It seems that I do better work if I don't try to sew it all up in one sitting. He he! The pink fabric is a light weight cotton. The construction of this dress was somewhat difficult with the collar but after working with it a bit, it went into place. I did make some pattern changes. All the changes were made on a copy pattern that was made from the original. With the copy I made adjustments to the bodice by adding a inch to the length and I also found I needed to lower the armholes! More changes to the bodice included putting in some much needed darts to take out the fullness in the waistline. I generally like a smoother waistline. It draws the eye away from the hips! For the skirt, I was thinking about  a 50's rockabilly type of look with the pink polka-dot fabric but, as I was finishing the dress up, it looked a bit too much for me. So in the end, I cut the A line down and made the skirt a bit straighter.  All in all I am glad to have another dress under my belt!

Things I would do different.

1.  Use a heavier fabric for this style of dress, I like the cotton but maybe a medium grade would have been better.
2. The handmade belt could have used some buckram in it to stiffen it up. The dress can easily be worn without the belt.

Things I am glad I did.

1. I felt more patience with the process of this dress, so I am glad I went slow with it.
2. I am also glad I made a copy of the pattern, that way I didn't concern myself with cutting /taping it up. I highly suggest doing this.

Overall, I love how this dress came out. I have only sewn a handful of dresses so it's encouraging me to be hopeful that I will  learn to sew better but for now it's my favorite sewing project. I think I am going to sew another dress in this style. Maybe use a fabric with some stretch in it and cut the waist down a bit more. Since losing some pounds it's a bit loose, hooray!

Thank so much for stopping by and visiting my little, happy, humble blog!

Have a fantastic vintage day!


Gina