Friday, April 29, 2011

Choosing a pattern size

Choosing a pattern size can often leave one wondering. There are many options and theories about picking out a workable size.  I am not an expert, this is what has worked for me.  After working with all kinds of dress and blouse patterns, my hands down, best experiences with fit, has been with a pattern based off of my high breast measurement. This is not 100%, all the time accurate, but I am pretty pleased with the results. I can buy a 32 or 34 pattern. The one thing I keep in mind when waffling between these two pattern sizes is the amount of ease a pattern has built into it.
 Garment ease is defined as  those extra inches of fabric that can be pulled away from your body when wearing a garment. Everyone has their comfort level for the amount of ease they desire. All garments have varying degrees of ease to them. This is something to keep in mind when shopping for a pattern.
                                                  
You may be wondering why the high bust measurement when buying a pattern?  Well, according to Fit for Real People by Pati Palmer, this is the good way to buy a pattern if you have a bust size of a C cup or higher.  Have you ever made a pattern that fits your bust, but the shoulders were too large?  This maybe a indication that you need to buy a smaller size pattern.  Shoulders can be very tricky to adjust, it's generally not recommended. So to start, take a measuring tape and go around your whole body as shown in the drawing and marked with a number 1.  If you are high busted, try to measure with as little breast tissue as possible, this will ensure a  more accurate measurement. Area 1 marks the HIGH BUST, area 2 marks The BUST. After measuring both places subtract the numbers, now look at the Cup Size Chart, this one only goes up to D cup. You should know your cup size based off what you just measured.

Cup Size Chart 
DifferenceCup Size
Up to 1" (2.5cm)A
Up to 2" (5cm)B
Up to 3" (7.5cm)C
Up to 4" (10cm)D

 C cup or higher- You would buy a pattern based on your high bust measurement, that number is to be substituted for the bust measurement on the pattern envelope. So if your high bust measurement is  34 inches then you would buy a size 34 pattern.
Note: If you are full busted then you may need to do a FBA to your pattern, check out some tutorial here from Gertie!

What if you are an A or B cup? Many women are wearing the wrong size bra, so I would suggest measuring both areas if you haven't in a while.  You may be surprised at the results!  My friend was wearing an A cup and got measured, she was a C cup! Remember 2 inches or less between the high bust and bust means you would be an A or B cup.
A or B cup- You would buy a pattern based off of your true bust measurement and not the high bust.

Finally, as an example, my high bust is 32 3/4, my bust is 35 1/2. That's a 2 3/4 inch difference. So according to the chart, that makes me a C cup. Here are two patterns that I made up in a muslin. They are close to my size and close in garment ease. The first is based off my high bust, it's a 33 pattern. The second is based off my true bust, it's a 36 pattern Can you see the difference? Both are workable, but the one based off my high bust gets me a little closer to a garment that fits. 
Notice where the shoulder and sleeve meets, this is a good fit. Minor adjustments are needed at the waist, but over all based on my high bust, it works! FYI- this pattern is a half size so it's a bit short-waisted for me.
The 36 inch pattern swims on me. The shoulders are way too large for me. But according to my bust measurement this is the size I should buy.

This is only one way to buy a pattern for it's size. Adjustments could be needed for a great result. How do you choose your patterns? What method have you found that works for you? I hope this has been helpful. Have a great vintage day!

Gina 

Saturday, April 23, 2011

Tilly and the Buttons Sewing Productivity, the results are in!

Here I am in  my snap up vintage house dress with my geek glasses! I am always checking fit as I sew,  the snaps are helpful with getting changed quickly. The readers help act as a magnifier.

Well, with all self reflection comes answers to questions we ask.

Tilly asked, how do I feel before, during and after sewing?

 Mostly happy and hopeful to start. During- I feel totally engrossed in the craft. The house could be on fire and I wouldn't know! After- I feel guilty for spending so much time sewing for myself. Time flies, and I am unaware.

What are the factors that effect my sewing time?

 My attitude, kids needing my attention, phone calls, preparedness, and general learning curve! The biggest factor is this,
I am cheap when it comes to my hobbies! This causes me to be very unproductive! The scenario is, at the store with list in hand, I find myself looking for the red tags instead. Often leaving with bargains, but not items from my list. My thinking is, I'll find better quality items and on sale at some other store. This is robbing me of time and money. To add insult to injury, Joann's is near the thrift shop.  One hour later, I go home with a bag of clothes, but without the zipper I need to complete a dress. Bottom line, I need a plan to buy the all the stuff for a project. Sometimes good is good enough!

Tips I found helpful for me are,

1.  I need to slow down to speed up.  Rereading through the pattern one final time equals less mistakes!

2.  Another tip I am finding valuable is to, coordinate my sewing projects with my existing wardrobe. Before choosing a pattern and fabric, I am asking, what are the gaps in my closet that need to be filled? If I make this item, what shoes and accessories will work with it? This week, I did some soul searching and decided it was time to clear things out and get a thoughtful plan!

3.  I can feel overwhelmed when having too many projects up in the air. I have decided to just have two projects, no more or I become unhappy mommy, and no one wants that girl hanging around.

4.  Fitting before sewing is success for me! A sloper is the best way to check for fit quickly. I now make a sloppy copy every time I use a new pattern.

5. A prepared sewing room with materials ready is a key for me. I wind up 2 or 3 bobbins right before starting a project so I am not winding right in the middle of sewing. I also have a basket with all the materials for the dress I am making, so I am not hunting around for these things when I need them.

6.  Clearing my head of any "baggage" from the day helps creativity to kick in and dreaming to emerge. Sometimes if my mind feels unresolved about something, I take some time to let go or deal with anything that may hinder me from being in the moment of just sewing. I find I sew better when my heart feels light!

7. Two to three hours of sewing is a breaking point for me. It's like eating too much chocolate, some is great, too much and I feel like I have overindulged. Also, I become sloppy at the machine. So, a break is in order here!

The biggest take away for me is, I must have a road map. Take an inventory, know what I need, so I don't waste time and money. Sewing has become a way of life for me, but sometimes it's encroaching on the time that I want be spend with hubby, loving on my boys and maintaining my home. So, I am promising myself that I will think through what to sew, write it down, get the materials needed, stay organized with my trips to the store, and not let the house burn down from me being unaware!

Thanks Tilly, learned a lot this week! I am hoping to learn from all your tips too!

Have a wonderful vintage day!

Gina

Wednesday, April 20, 2011

A Smart Everyday Dress


Add caption

It was dark in the house so I took the tripod outside, windy day! lol

I tried to line up the checks


Closeup on piping on neckline cute thrifted belt!

I've had a passion for check fabric that dates back to childhood. If I could have made a dress from the check tablecloth my mom used for the camping picnic table, I would have. I really love how this dress came out. First, I must say I love the red piping that I found hiding in my sewing box. Although, it was difficult getting the piping sewn into the neckline and pockets, I am glad I took the time to do it. 

  I  also buckled down and got the sleeves put into the armhole correctly. The pattern was a bit confusing and specifies the fabric to be clipped at the sleeves and bodice in two places, but doesn't show you exactly where to clip.  Do you feel a little hesitant to clip fabric when making a pattern?  I do, I want an X marks the spot, clip here with an arrow or some indication. You've got to love 1940's pattern for their instructions, but after working a bit, the sleeves went in perfectly! 

 The buttons came off of a old jacket that was 1/2 price at the thrift. Buttons have becomes quite pricey, so I buy them on garments from the thrift, this is the best way for me to keep the cost down. Finally, I wanted to say, thank you, so much for all your encouraging words, I am overwhelmed with gratitude to the readers of my humble blog.

Have a wonderful vintage day and happy sewing to you all!

Gina

Monday, April 18, 2011

How much is enough?


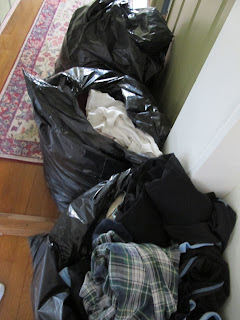
 Today, I am letting go of everything that isn't working in my wardrobe.  I started Tilly's Sewing Productivity Project.  Asking some questions and I have come to some conclusions.  I am  realizing that I don't plan my wardrobe, the result is, too much in my closet that doesn't work.  For example, I have 15 pairs of pants that I don't wear because they feel clingy on my legs. My closet has clothes that are too small, too large and the list goes on. Sure, I am a thrift shopper and because clothing is cheap, I buy too much.  Four hours and four large trash bags later, these clothes are leaving my home.  As I look at my summer/spring wardrobe, I need a good plan.  With 18 summer skirts, you would think I would be set, but most don't match any blouses I have.  As part of Tilly's project, I am including taking an inventory of everything I own, looking for gaps. Then, I am purging the rest. I would like to have my spring/summer wardrobe down to this:

12 skirts
12 blouses
12 dresses
10 knits shirts
7 nightshirts
10 light weight jackets and coats (I love coats, 10 seems like a lot)
5 spring sweaters
2 sweat shirts
3 pair of pants for painting/yard work
2 workout outfits
5 pairs of shorts
3 bathing suits
2 special occasion outfits
1 funeral dress (more on this later)

Does this seem reasonable? Is this realistic? Am I missing something?  You may ask, why am I doing this.  Mainly I am making room for this new phase in my life of sewing my own wardrobe. I want to count the cost, take the inventory and make a plan that works. I am done with over stuffing my closet.  Do you struggle with your wardrobe? Do you have a plan or buy, make, whatever comes your way? Do you have any tips to share with everyone about how you have built your personal wardrobe?

I am hoping to become more productive in having a simple vintage wardrobe that mixes well and is easy to wear. That's the goal! Thanks Tilly!

Have a wonderful vintage day!

Gina

Summer top from my giveaway material


Yes, we are experimenting with the hair, it's not just right yet!


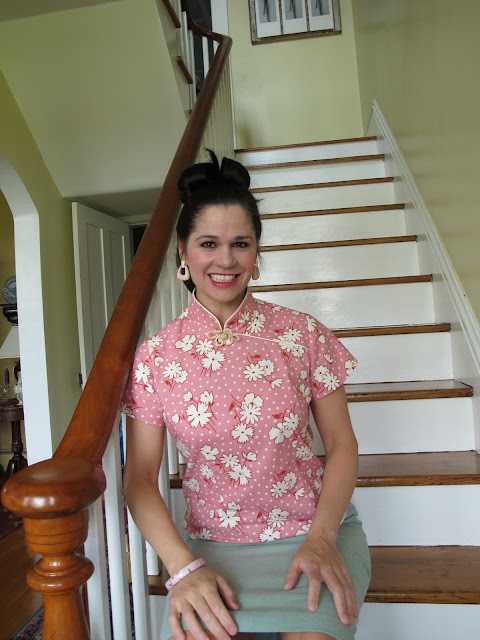
Thanks to Nan from Retired in Alaska.  She recently had a giveaway and I won. She sent me many pieces of material. Among them was this pretty pink cotton.  I had enough to make this top. I have been wanting to make some separates for my summer wardrobe.  I know brocade fabric is customary for these kinds of blouses, but I couldn't help but to think this cute fabric would make a nice top.  I am really pleased that I didn't over fit it. It's roomy and comfortable.  It's going to be one of those tops I grab for a busy day of baking or playing at the park with the boys.  For now, I am going to pair it up with this light green skirt from the thrift.  I also tried something new and made the piping from scratch!  Yes, I typed that right. I have a ton of bias tape, but not much piping left in my sewing box.  So I matched up the bias tape and with some cording, sewed it up under my zipper foot and out came piping.  It worked great and was easy to make.

Have a great vintage day!

Gina

Saturday, April 16, 2011

Tilly's project and Portia's Draft Along

This is how I wear my hair when I am sewing and getting down to business, smile included!
This week I have decided to participate in two different "alongs". The first one is a draft along with Miss. P.   Fitting the body is intriguing to me.  I am hoping to tackle a few more fit issues with Portia.  I am very excited about drafting a sloper with the option of adding various necklines to the base sloper.  If you have ever tried drafting a pattern, as I have, you know that it can be time consuming, sometimes yielding little positive results.  So I am putting my hair back and getting ready to dig into another bolt of muslin. Wish me luck!

  Also this week, I signed up over at Tilly and the Buttons to chart my sewing productivity.  I love to learn from others what works for them.  I am looking forward to reading the participants thoughts and tips to better utilize their sewing time.  I will be starting today and for one week I am writing it all down! Then next week I will be posting on the results of this process.

And now I 'll leave you with some eye candy from my travels. Patterns, and for 25 cents a piece. They are old and a bit tattered but a great deal.


Have a wonderful vintage day!

Gina

Monday, April 11, 2011

Easter dress


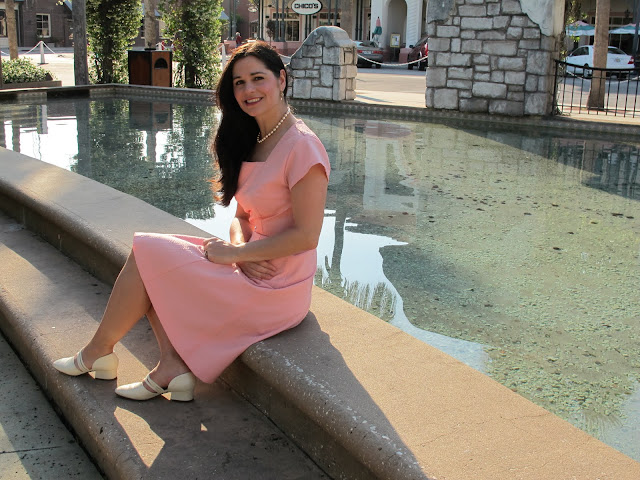
Every year, I struggle with Easter time. Spring comes and melts away the snow and the bright, sun peeks out again after a long, gray, winter. Winter brings wonderful, comfort, foods that have a lasting effect on my body. Suddenly, I realize the snow is disappearing but the pounds I have gained over the winter months will not, at least not easily. My family takes a spring vacation to Florida annually. Florida conjures up a bit of a panic for me, because it means bathing suits, shorts and a Easter dress. Easter is a special time for our family and we always dress for the occasion. Looking in my closet, I knew I needed to make a dress. I wanted pink. In the past, I have worn black on Easter, mostly because it was the only dress that fit me, the good news this year is that I have ate better over the winter and it has helped.  I am not in a frenzy about what to wear, I will sew what I need. What a relief to know my dress is right in my fabric closet and hidden in my imagination. This is my Easter dress. I made it from this 1940's pattern. After making the swing dress earlier this year, my hands got itchy to underline a dress. I don't want to wear slips all the time and this seems like a good alternative to them. I used the information from Gertie's blog for underlining.  Anyway, I am very happy with the fit of the dress.  The lace jacket I bought at the antique store just needed a few alterations. I was surprise that I had no problems sewing the lace on my machine. I think the combination is nice together. I hope you having a wonderful spring.

Happy Vintage Day to you all,

Gina

Friday, April 8, 2011

Learning from a master and a blind hem stitch

This week I had the privilege of spending some time with a tailor/seamstress who has worked 40 plus years making incredible clothing.  She had her own business and was well known for her work throughout our city.  She is a relative, that I see once a year for a couple of hours.   Today, for the first time I was able to show her my dresses and ask a few questions about fit.  She in turn, said I am doing really good work and was surprised by my sewing ability.  Blush.  I told her I learned most everything from the internet sewing community and that the tutorials of many talented girls were my greatest helps.
 I then asked her about blind hems, mine do not look so blind. So today, thanks to Edith, I learned how to do a blind hem by hand. Do you remember this dress? Well, the hem never looked quite right to me. You could see the hem, which is something you don't want with a blind hem. The reason for this was, I collected too many threads, thinking it would hold the hem up better. The result was a blind hem that wasn't blind. She showed me that I only need to pick up one thread, not two or three. For a video on how to do a blind hem by hand, check it out here.             


 I am also putting together some pictures for you if you want to see how I did my blind hem. All you need is matching thread, needle and thread cutters or scissors. Start by threading your needle and putting a knot at the end. I make a sewing thread, about two feet long. You will have to do this again as you run out of thread. I find it's easier working with a shorter thread line, if it was longer it might get tangled up. Start at the side seam, take your thread from behind,  hiding the knot in the seam, pulling it out towards you then continue your stitch every 1/2 inches, catching only one thread of your dress front to the hem tape.


Here is a close up, I hope you can see how I am catching the fabric and then the hem tape to make it appear blind from the other side.


Above my thumb, you can see the threads that make the stitch, I will be making a stitch every 1/2 inch all the way around.


Here is part of the finished blind hem, It looks pretty good to me, a definite improvement over the first one. I hope to get better with this technique, but for now it looks so much better! To finish off your stitching threads, put a few knots in the hem tape, then cut it off threads and your are done! Easy! Check out the video above, it's very helpful.


 Edith also gave me another good tip that I wanted to pass on to you. She always adds a whole inch to the side seams all the way down. She told me this has served her and her customers well over the years.  This is not for a shoulder seam, just the side from the under arm down to the floor. This insures that as the body changes you can make adjustments to your beloved garments.

Also, she gifted me with some fabric she has collected over the years. I have already started making plans for them.

Have a wonderful vintage day!

Gina

Tuesday, April 5, 2011

Next projects!


This post is a bit of housecleaning for me with lots of bits.  First, I  wanted to let you in on what I have been working on. Today, I spent some time making a copy of a very brittle 1940's pattern. Sometimes, I use a pattern as is, but this time I was very concerned about destroying the original, so I made a copy. It's a mail order, unmarked pattern.  By making a copy I can translate the markings directly onto the new copy. It's not unmarked anymore. Another good reason to trace unmarked patterns!

Also, I wanted to say a big thanks to Colette Patterns and Tilly and the Buttons, for the give-a-way prize of this fabulous skirt pattern!  I adore the skirts Tilly has made, and hope that I may make one that looks as nice as hers. Also, another big thanks to Nan from Retired in Alaska. She recently hosted a give-a-way that I won. She was most generous with the beautiful fabrics she sent to me along with a sweet handmade bookmark that I have been using already.

I also made another skirt in a lovely blue color! It's another great fabric from the thrift store. It's bright and happy! I would have modeled it for you, but I need to make a blouse to go with it! I think I want to sew up this skirt in a red material too!

                                                         
Finally, I wanted to say one more thing about my sewing area. There were a lot of great comments from the last post. I know my area is clean, but it does get messy. Please, do not put a burden on yourself or feel bad if you operate in what appears to be a messy sewing room. I find there are many types of artist and crafters out there. Some, to me, look like they are working in total chaos, but for them, they are finding everything they need. There is a flow to their craft that is wonderful and amazing. For me, working in a messy, unorganized space is very distracting, frustrating and hard on me visually. It zaps my creativity in ways I can't explain or identify. Mostly, I am posting this because I think people have a tendency to compare apples to oranges in regards to how they function with their personal creativity . If you are an orange, be an orange, don't add a burden to get your act together because really your act is together. You are operating in the way your brain works! Embrace it! Now, if you are an apple and need to clean it up a little, then make a date with your sewing area and get it clean so you can go forth and conquer that sewing project buried on your desk.  Whatever your situation, having a place to be creative is the most important thing. You will know when it's time to clean the clutter out or add some pretty things to your space to inspire you. Sewing for me, is an outlet that has kept my spirits up, given me a soft place to land when stress has been crouching at my door. So above all I want it to be relaxing and my wish for you is the same.

Best regards to all you sewers, crafters, apples and oranges out there, you know who you are!

Have a wonderful vintage day!

Gina