Sometimes I need to take a break from sewing! You got to know when to back away from the machine! Do you ever feel that way? One night I got the giggles after sewing a dress. I knew I either needed to cry or laugh, I chose to laugh, put my hair in pigtails and have a dance party right in my sewing room. Here are a couple of pictures of me goofing around, letting off stream. As a new sewer, I would like to say that it's not fun if you are feeling frustrated and uptight! Sometimes a little break is what's good for the heart! I also want to say I will see you after Christmas, so have a very Merry Christmas and Happy New. Join me next year as I have many projects in the works, including a sew along with Casey, 1940's and 50's dresses and maybe some new purse inserts to keep me organized in the new year. I found this little bright green vintage purse that I'll be making a insert for. I also couldn't resist showing you this Christmas tree pin I made at a homeschool party for my kids, it looks a bit off in this picture but hangs nice on clothing.
In this new year I hope to bring you the ups and downs of sewing from a semi-beginner's viewpoint. Also, I'll be posting about some interesting vintage finds along the way. Until then, thanks so much for reading this blog , please feel free to leave a comment, drop a line, or offer some advice with sewing!
From my house to yours,
Happy Holidays!
Gina
Monday, December 20, 2010
Thursday, December 16, 2010
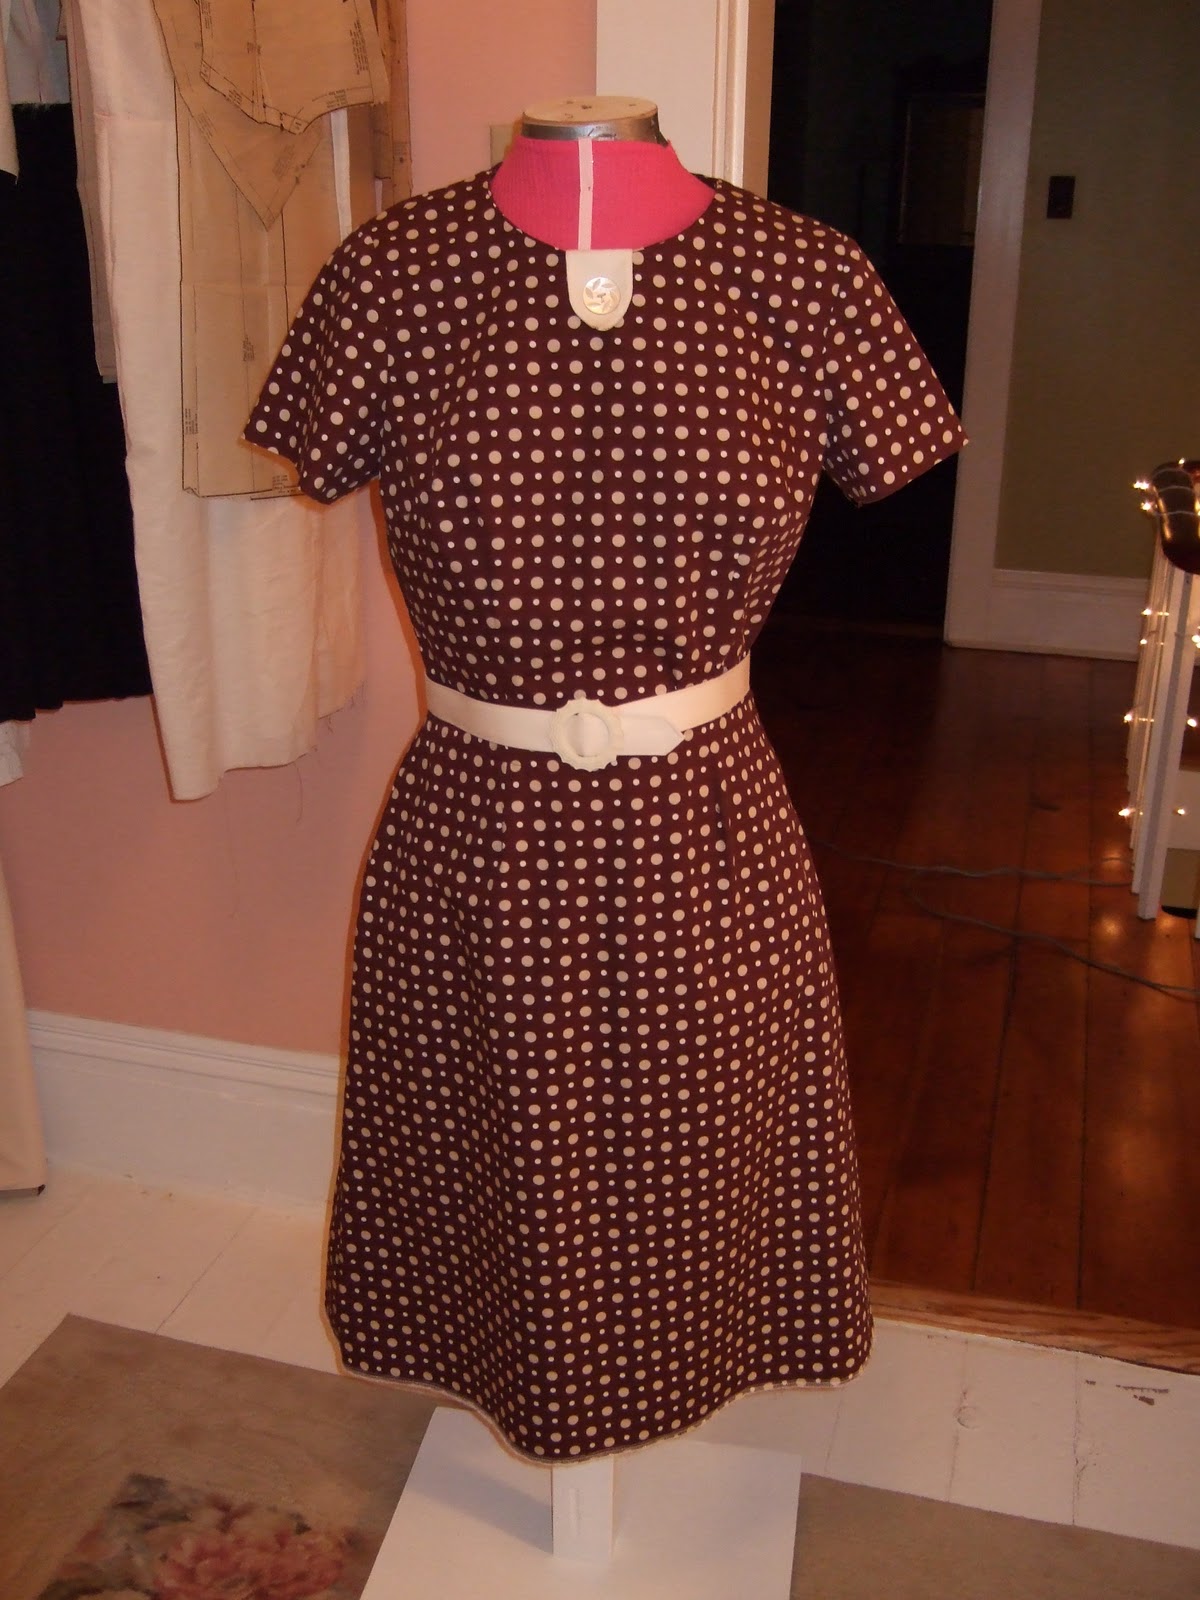
The seam ripper dress!
I love this collar. This pattern was too cute for me not to make. I think it's from the early 60's or late 50's ( no date on the pattern). I was thinking of my sister when picking out the fabric for this dress, when she goes shopping she only buys what the mannequin is wearing. I guess I am following her lead because, I like what the model on the cover is wearing. He he, and I had some black fabric and couldn't resist making the dress look like the pattern cover. All in all, this dress came out okay. It's my fourth dress, we are learning! I did make a muslin up first. The collar was tricky because it's sewn in a way that you are not really sure if you are going to get the center facings pulled in enough for the collar to lay flat. It was a walk of faith that it would work. Well, it didn't at first, because I couldn't get it lined up and set in the seam correctly. I had to take it out twice! Also this dress was really hard on my seam ripper! I am calling this dress the seam ripper dress because every seam had to be taken out. It was SLOW going with this one. Also the original skirt had soft pleats and I am trying to lose weight so the pleats and the shape of the skirt was a little much for my curvy hips. So I am going to draft a A line skirt and go with the A shape instead. Which means this skirt has to come off! In the end, I think I will be happy with it. I am looking forward to wearing this dress when warmer weather hits. Still deciding on the hemline, been thinking knee length! I will post when I get this done! The side zipper is not even in yet! Right now I need a break from this dress and so does my seam ripper!!! LOL!
Pin me!
Don't you just love pins? They come in so many different shapes, sizes and colors! Brooches seem to add that final finish to a coat or vintage dress like nothing else. You can wear them on hats, purses, belts, shoes, skirts and of course shirts. They can be found at any thrift or flee market in abundance. I think they really help tip the scale towards the vintage look when an outfit looks kinda vintage but "needs" something. And of course they go great with a vintage dresses. I love how Casey from Elegant Musings wore this pin on her dress, right in the center. It's just perfect! Over the weekend while out shopping I collected a few more pins to add to my collection. Here are a few of my favorites.
![]() |
| Casey fromhttp://blog.caseybrowndesigns.com/ |
Thursday, December 9, 2010
1948 pattern for smartness
YouTube - Pattern for Smartness 1948 - dress-making & fashion show (1)
These are two of my favorite sewing videos, they were for me the jump start I needed for going into vintage sewing. Some of the dresses are just so pretty and ladylike. Someday I hope to sew some of these beautiful thing. Have a happy, beautiful vintage day! Enjoy!
Monday, December 6, 2010
Sloper Dress
This project was a bit of drafting and a bit pattern. Years ago, I tried my hand at drafting a sloper pattern for a bodice. After many tries I finally came up with a good fit. Then, I made a skirt sloper. Well, it's been great having slopers but I couldn't figure out how to make a sloper pattern for SLEEVES, one that didn't include 4 inches of ease. The ease is what causes so many puckers in sewing. I worked and fiddled around, and knew I needed help, so I got some advice from a girl we all know who sews really WELL and because of the advice, I got pretty close to making a good sleeve sloper. I was in the middle of making this dress and decided to use the sleeve sloper. I am pleased with the outcome, the armholes were already cut but I did adjust the sleeves and got rid of most of the puckers!! No more sleeve nightmares! I feel like the dream of wearing vintage handmade clothing is getting closer into view. If you haven't tried making a sloper, they are a great tool to have around, a little time and in the end a better fit!
Tuesday, November 30, 2010
Honey, where are the nail clippers?
Honey, Where are the nail clippers?
This question has been heard in own home more than I care to admit. Most times they were in the bottom of a drawer, which one, I was not sure. Grandma always said "everything has a place." Well, this project is one of those things after you do it, you wonder why did it take me so long! No more losing your clipper or tweezers! This is what you will need.
-A glue gun and glue! or you may be able to used super glue.
-small magnets, I used circle shaped ones found at Walmart
That's it! I must tell you that I just that I used super glue! I put mine on the back of a wood door and they are sticking really well, no problems!
Okay, decide where you want your clippers and tweezers. If you are choosing behind a door or medicine cabinet, make sure you can close it. Once you have it marked, put your glue on the back of the magnet, making sure you have the attraction side of the magnet facing out. Glue and put into place. Apply some pressure with your hand. Careful not to get glue on your fingers. Allow to dry and pop on your clippers! Hang them sturdy by giving each clipper a couple of magnets! Never lose your clippers again! Try it!
Wednesday, September 23, 2009
Laundry detergent
This all started with sour smelling towels. We would use our towels for 2 days and they would smell moldy. Well, after some research, I found out that most detergents don't rinse out completely. So the moldy smell came from soap that had accumulated over time. I tried adding vinegar, which did not resolve my problem. I had a recipe to make my own detergent. I didn't expect the outcome to be this good. We only use this detergent now, my family has been using it for three years. A week ago, I ran out of it and was looking for the ingredients, I didn't find everything that night at the store. So, in a pinch I brought some detergent to hold us over. It was instant! The laundry did not smell or feel as clean. My husband even noticed! This stuff is good. You do need to treat stains with this detergent (most detergents have harsh chemicals to get out stains, most of the time they get out a few stains, but I always needed to use a stain spray even with Tide, Surf and Gain). So now I use 2 tablespoon of the detergent, a capful of downy and spray and wash on my stains and everything comes out smelling and looking good!
- 4 bars of Fels-Naptha soap
- a box of Borax 4lbs 12oz
- Super Washing Soda 3lb 7oz
- That little cup from the NyQuil container, it measures 2 tablespoons or 1 oz (that's what you need per load, no more!)
You can find these ingredients at Kroger's. I've also seen them at Walmart and Meijer's. Look for sales. My bill for everything was $11.41, that was without any sales. This batch will last me almost a year.
Okay, this is what you need.
-a big container, one that holds a couple of gallons (Mine holds 33 cups)
- Food processor, large knife, a spoon,
- 4 bars of Fels-Naptha soap
- a box of Borax 4lbs 12oz
- Super Washing Soda 3lb 7oz
- That little cup from the NyQuil container, it measures 2 tablespoons or 1 oz (that's what you need per load, no more!)
You can find these ingredients at Kroger's. I've also seen them at Walmart and Meijer's. Look for sales. My bill for everything was $11.41, that was without any sales. This batch will last me almost a year.
Okay Let's make it! Get your container ready, make sure it has a lid. Mix the Borax and Super Washing Soda together, set aside. Cut up the bars of soap into small 1 inch blocks, put the blocks of soap into the food processor. Don't worry, remember it's just soap, the same thing you wash your dishes with. Pulse until the soap is a little smaller than pea size. Mix all the ingredients together in your container with the spoon. That's it! Use only two tablespoons per wash. Don't worry it will be clean! Shake up the detergent from time to time before using. It keeps forever! Enjoy!
Have a wonderful Vintage Day!
Gina
Have a wonderful Vintage Day!
Gina
Subscribe to:
Posts (Atom)